Today, digital manufacturing platforms make it easier than ever to create a tangible component from a digital idea. But how exactly does the process from 3D model to finished component work? In this article, we will show you the process - from data preparation and production to post-processing and delivery. In particular, we will shed light on how the PROTIQ marketplace makes this process efficient.
Step 1: Create or procure a 3D model
It always starts with a 3D model (CAD model) of the desired component. Without digital 3D data, there can be no 3D printing - it is the basis of the entire additive manufacturing process. There are several ways to obtain such a model:
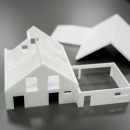
Design it yourself: You can use common CAD software, online generators or even 3D scanning to create your own models. It is crucial that the model is exported as a printable file (typical formats include STL, OBJ or STEP). These formats describe the 3D object in such a way that 3D printers can read them.
Hire a designer: If you have no experience with CAD, you can hire a designer. Many service providers (including PROTIQ itself) offer data creation as a service to turn an idea or drawing into a printable 3D model.
Use existing 3D models: There are online libraries and communities where you can download ready-made 3D models. Components, prototypes or spare parts are often already available there as files. It is important to check the license conditions and ensure that the model meets the requirements (correct dimensions, no errors in the geometry).
If you have a 3D model available, it is advisable to check it again to avoid problems when printing. Many upload portals also carry out an automatic data check as soon as you upload the file.
Step 2: Upload 3D data and receive a quote
The PROTIQ marketplace offers you two options for obtaining a quote:
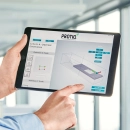
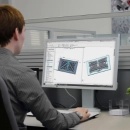
Option A: Direct upload and instant quote
The direct upload with immediate price calculation is suitable for simple projects or individual parts. You can configure your uploaded CAD file directly on the platform: Select the material, manufacturing process and the desired supplier. You can see the prices for the various options directly in the configurator. This allows you to compare in real time how different materials or quantities affect the price and delivery time, for example. Once you have made the right choice, you can place the component in the shopping cart and order it directly. Ordering via the online platform only takes a few minutes and is handled completely digitally.
Option B: Project tendering for complex orders
For more complex projects - such as series production, larger components or special requirements - PROTIQ offers the tendering function. Here you can enter a detailed request in which you specify the requirements, desired material, process, quantity and other parameters. Instead of an immediate price, you will receive offers from the marketplace providers after some time, which you can view and compare in your account. A tender usually runs for a few days (you set the deadline). At the end, you select the best offer and place the order with the corresponding provider. This tendering principle has the advantage that you receive individually tailored offers for complex projects and can choose from a bandwidth of specialists. It saves time, as you do not have to contact different service providers individually - one request, many offers.
In both cases - whether instant costing or tendering - as soon as you have commissioned a quotation, it's time to get down to business: production.
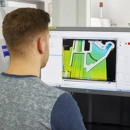
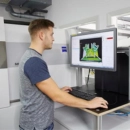
Step 3: Print preparation by specialist staff
BBefore the actual 3D printing starts, the uploaded data is checked for feasibility and optimized for production. Depending on the process, material and component geometry, various steps may be necessary.
PROTIQ first checks whether the model is printable - for example, whether all the walls are thick enough or whether the geometry has any potential problems. Minor errors can often be corrected automatically. The next step is to determine how the component is to be placed in the printer, whether and where support structures are required (in the case of SLM) and which printing parameters are to be used. In the case of plastic parts in the SLS process, several components can be arranged together in the entire installation space in order to make optimum use of the available space.
Finally, a final check is carried out: the data is prepared for printing, divided into layers and transferred to the machine. The actual production process only starts when everything is correct.
Step 4: Manufacturing the component
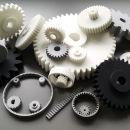
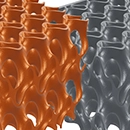
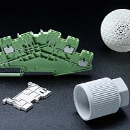
Now comes the actual manufacturing process. A wide variety of processes are available on the PROTIQ marketplace, but we will focus here on two common processes that are also used at PROTIQ itself: Selective Laser Sintering (SLS) for plastic parts and Selective Laser Melting (SLM) for metal parts. Both are powder bed processes in which powdered material is processed layer by layer.
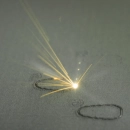
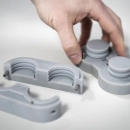
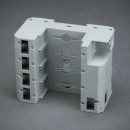
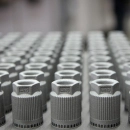
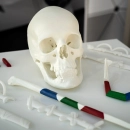
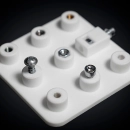
SLS printing (plastic): In the SLS 3D printer, a thin layer of powdered plastic is applied to a build platform. A laser beam then traces the contours specified by the CAD model and selectively melts the powder at the defined points. This creates the shape of the component in the powder bed layer by layer. After each layer, the build platform lowers slightly, new powder is applied and melted by the laser - until the component is completely built up. The surrounding, unsintered powder supports the structure so that even complex geometries or undercuts can be printed without additional support structures. During the entire process, the machine keeps the powder temperature just below the melting point to avoid stresses and reduce laser energy consumption. An SLS print can take anywhere from a few hours to over a day, depending on the height of the component and the filling level of the build space. Modern systems make it possible to produce very efficiently overnight or over the weekend.
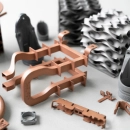
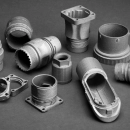
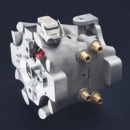
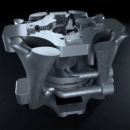
SLM printing (metal): The principle of selective laser melting is similar, but with metal powder and some additional requirements. A thin layer of metal powder (e.g. aluminum, steel, etc.) is applied to the build platform, then a high-power laser melts the powder precisely according to the CAD data, creating an initial solid layer of the metal structure. The metal component grows layer by layer. As metals can shrink considerably during cooling and build up internal stresses, support structures in the form of struts are also printed to hold the component to the platform and prevent warping. These supports are made of the same material and must also support the component until the printing is complete and the material has cooled down. SLM works in an inert gas atmosphere because metal powder could react with oxygen at high temperatures. After each layer is deposited, new metal powder is distributed and the process is repeated. SLM is a comparatively slow process, but can produce high-strength, near-net-shape metal parts directly from the 3D data - a major advantage over conventional methods.
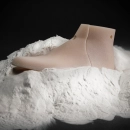
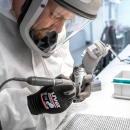
Step 5: Post-processing - from the blank to the finished component
After printing, the components are first placed in the machine: embedded in excess powder in SLS (powder cake), fixed to the build plate in SLM and surrounded by loose metal powder. Now the post-processing begins to turn these raw parts into a ready-to-use product.
Unpacking and cleaning: First, the printed pieces are unpacked. With SLS, this means removing the build platform with the powder and carefully removing the component from the powder. Excess powder is brushed off or blown off with compressed air until the part is clean. Unsintered powder is collected and can be sieved and reused for future prints.
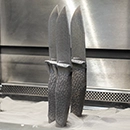
In SLM, the entire build plate is removed from the machine. Loose powder is also removed (often by vacuuming). Now you can see the raw metal part, which is still attached to the plate with its support structures.
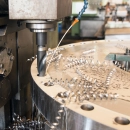
Separating and removing supports: The next step is to detach the SLM component from the build plate. Depending on the size and material, this is done by sawing, breaking off or wire-cutting. The adhering support struts must be removed manually - they are usually turned off, milled off or snipped off with a tool. Small marks remain on the surface where the supports were. These can be sanded down if necessary.
Standard surface treatment: Both plastic and metal parts are usually given a simple post-treatment to make them ready for use. Plastic parts made from SLS are often blasted after powder removal (e.g. with glass beads) to remove any remaining powder adhesions and to achieve a uniform surface. Metal parts made from SLM are blasted or machined (e.g. by milling mating surfaces) depending on the requirements.
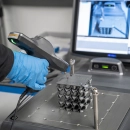
All components - whether plastic or metal - then undergo quality control (dimensional inspection, visual inspection, mechanical tests if necessary) to ensure that they meet the customer's specifications.
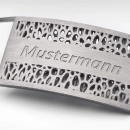
Optional finishing: Depending on the customer's wishes, finishing can now be carried out. There are numerous options here, such as Smoothing and polishing (by grinding, barrel finishing/vibratory finishing for SLS plastic parts), dyeing or coating (SLS parts made of PA12 can be dyed in dye baths, for example; metal parts can be painted or anodized) and more. These finishing steps are optional and are used when the surface and appearance or special properties need to be improved. At the end of post-processing, you have a finished component that corresponds exactly to your 3D model and the order requirements. It has been built up layer by layer and then treated so that it is ready for use.
Step 6: Shipping and delivery
Once the component has been completed and tested, it is packed and prepared for shipment to you. Most of our service providers, including PROTIQ, ship worldwide. When it arrives, all you normally have to do is unpack the component. It is ready for immediate use (unless otherwise agreed, you will receive it clean and, if necessary, reworked as ordered). In the event that something should go wrong, the support and service teams are on hand to solve any problems.
The path from digital 3D model to printed component is a multi-stage process - but modern platforms such as the PROTIQ marketplace make it user-friendly and efficient. You create or procure a 3D model, upload it, select the right process/material and receive your part in the shortest possible time.
Data checking, printing and post-processing run hand in hand in the background to ensure high quality. Additive manufacturing makes it possible to build components directly from 3D data layer by layer, without tools and with great freedom of design. This process has proven itself from prototyping to series production.
For you as a customer, this means: minimum effort with maximum flexibility. You benefit from the expertise of the service providers, do not have to operate your own production facility and still receive precise, high-quality components. Whether it's a single plastic spare part or a complex metal component in small series, the process remains similarly uncomplicated.
Are you interested in implementing your own 3D printing project? You can get started right away on the PROTIQ Marketplace: upload your 3D file, compare offers and quickly make the desired component a reality.


 Deutsch
 English
 Italiano
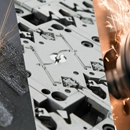


.png)